On premise Installation Guide Pro Mosquitto HA Cluster
Install Docker Environment
To run Cedalo products, you need an installed version of docker and docker compose. Docker is not system depended and can also be installed on Mac or Linux.
Open the following link and install Docker. If you have not installed a version of docker desktop and only installed the docker engine, make sure to further install Docker Compose.

Figure 1 - Docker Desktop Installer
Make sure your system meets the minimum requirements.
● 64 - bit processor with Second Level Address Translation (SLAT)
● 4GB system RAM
● BIOS-level hardware virtualization support must be enabled in the BIOS settings. The status can be
checked in your Task Manger:
If you choose Hyper-V make sure visualization is enabled. If Visualization is not enabled, you will have to turn it on in your BIOS. If you don ́t know how: Here is a very good step-by-step tutorial.
After installing make sure docker is running. On a typical installation the Docker daemon is started by a system utility, not manually by a user. This makes it easier to automatically start Docker when the machine reboots. The command to start Docker depends on your operating system. Check the correct page under Install Docker.
During the installation process, Docker requests from you that you set up an account with Docker. You need that account mainly for the setup/install process of Docker, but later you will be provided by Cedalo with a separate account to access the Cedalo registry.
Log into the Cedalo registry
To get your local premium subscription running you need to use the docker login we provided. You will not be able to pull the right images with your personal docker account.
After the docker installation you can use docker login to log into docker. (https://docs.docker.com/engine/reference/commandline/login/)
To login open your shell (e.g., cmd.exe under Windows) and enter following command:
docker login registry.cedalo.com -u [username provided by us] -p [password provided by us]
You should receive a message that the login succeeded, otherwise please let us know under getting.started@cedalo.com
If you are using Docker Desktop, logging in via the UI is not possible. Please use the command line login.
Start the Pro Mosquitto Setup
Download the shared setup via the given link we provided you in the e-mail and enter the given license in the license folder. The name of the file must be “license.lic”. This folder contains an example mosquitto 3-node cluster setup.
The example configuration may simply be started using the command:
docker-compose -f ./docker-compose.yml up -d
The following containers will be created:
- mosquitto1, mosquitto2, mosquitto3: The three Mosquitto cluster nodes
- HAProxy for the reachability of the active MQTT node for MQTT clients
- Management-center: The Management Center (MMC) which will connect to the individual Mosquitto nodes and the HAProxy
Docker will create an internal network with IP range 172.20.0.0/16 used for the internal communication between the containers. Each Mosquitto node will open the port 1885 on the internal network as an admin port for the reachability of the MMC. Please do not make this internal admin port reachable from outside the internal network. Additionally, the active cluster leader will open the Port 1884 for reachability from the HAProxy. By default, the test setup will only be reachable on localhost as the MQTT Port 1883 (from the HAProxy) and the MMC HTTP Port 8088 will only be bound to localhost. If you need the setup to be reachable from the outside please adapt the port rules in the docker-compose.yml file accordingly.
For more information about the cluster configuration see here.
Under normal circumstances, running further docker containers should not influence existing processes. However, this cannot be guaranteed. Please make sure to bring all Docker based applications in a secured state or power them down before logging on with the Cedalo premium subscription account and starting the Mosquitto Pro HA Cluster Setup.
Create a Cluster
Open the Management Center via: http://localhost:8088/
The root credentials are the following and can be changed in the docker-compose.yml file.
username: cedalo
Password: mmcisawesome
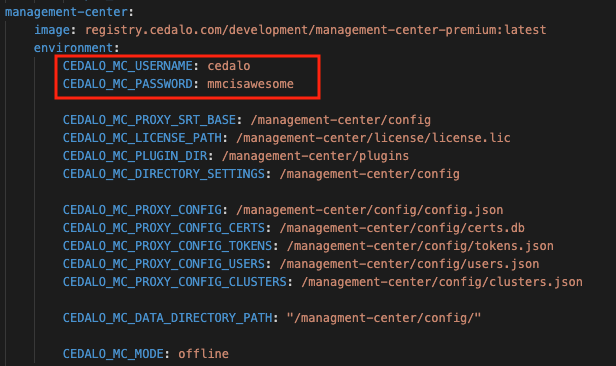
Further users can be configured in the Management Center (User Management Menu).
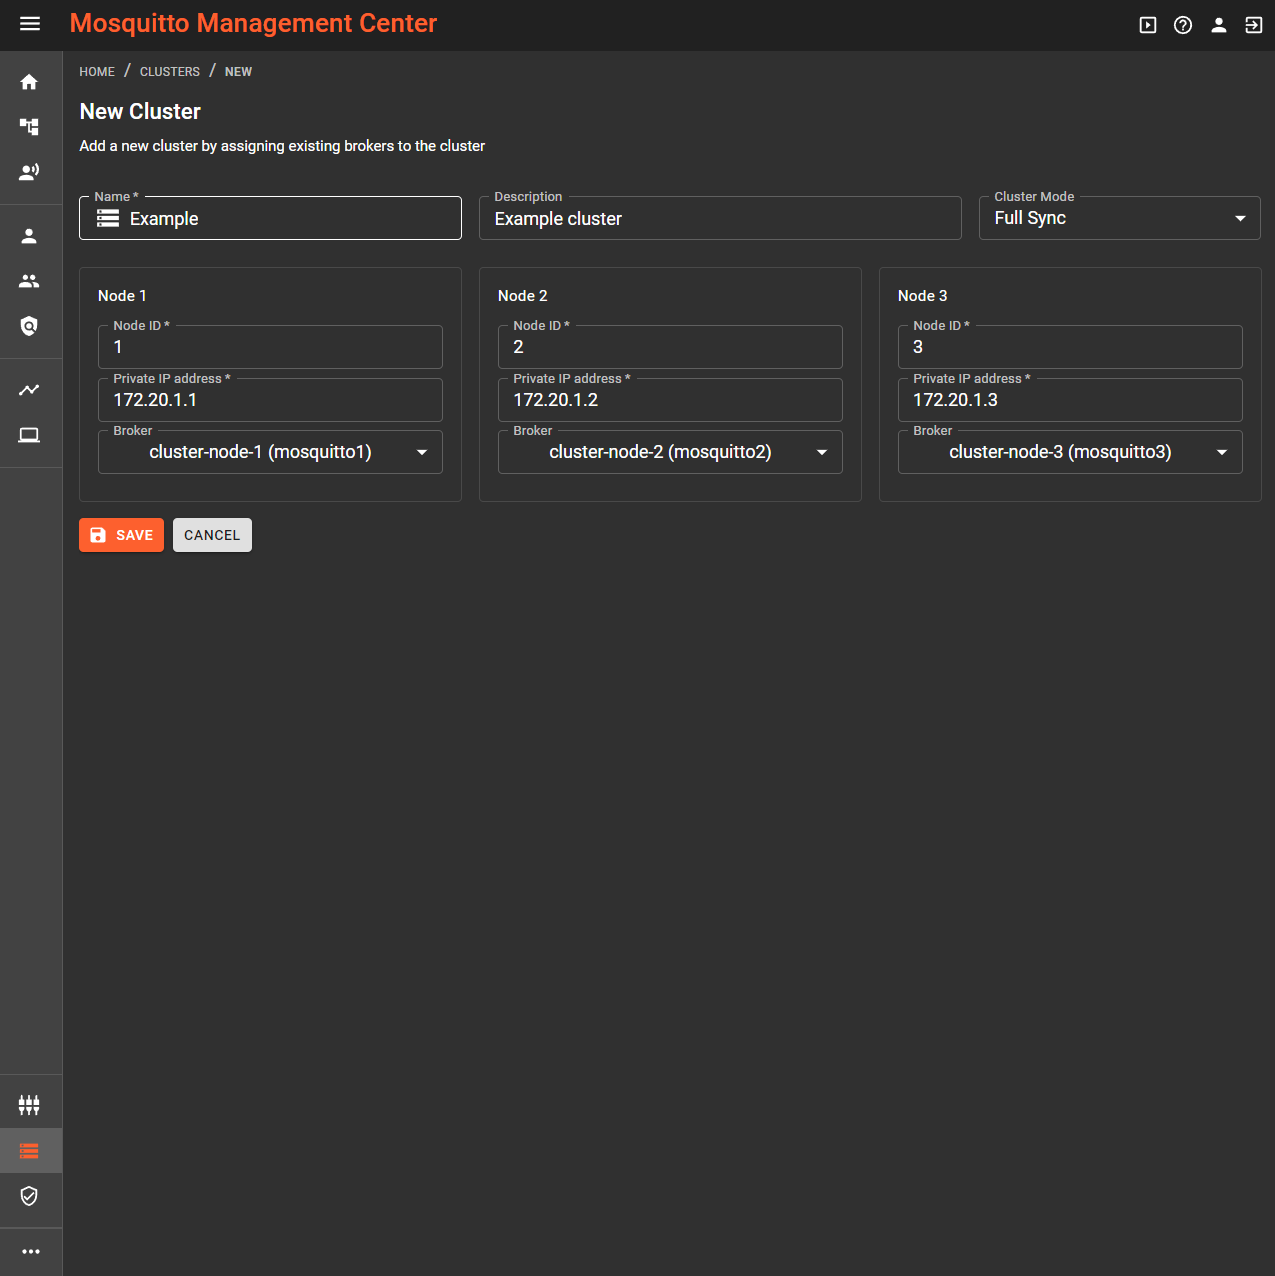
A local example Cluster can directly be created without any further configuration. First, make sure all three broker are connected (Broker Connections Menu). Then create a new cluster in the Cluster Management menu. The configuration is shown in the image below. You can choose between the cluster modes “Full Sync” and “Dynamic Security Sync”.
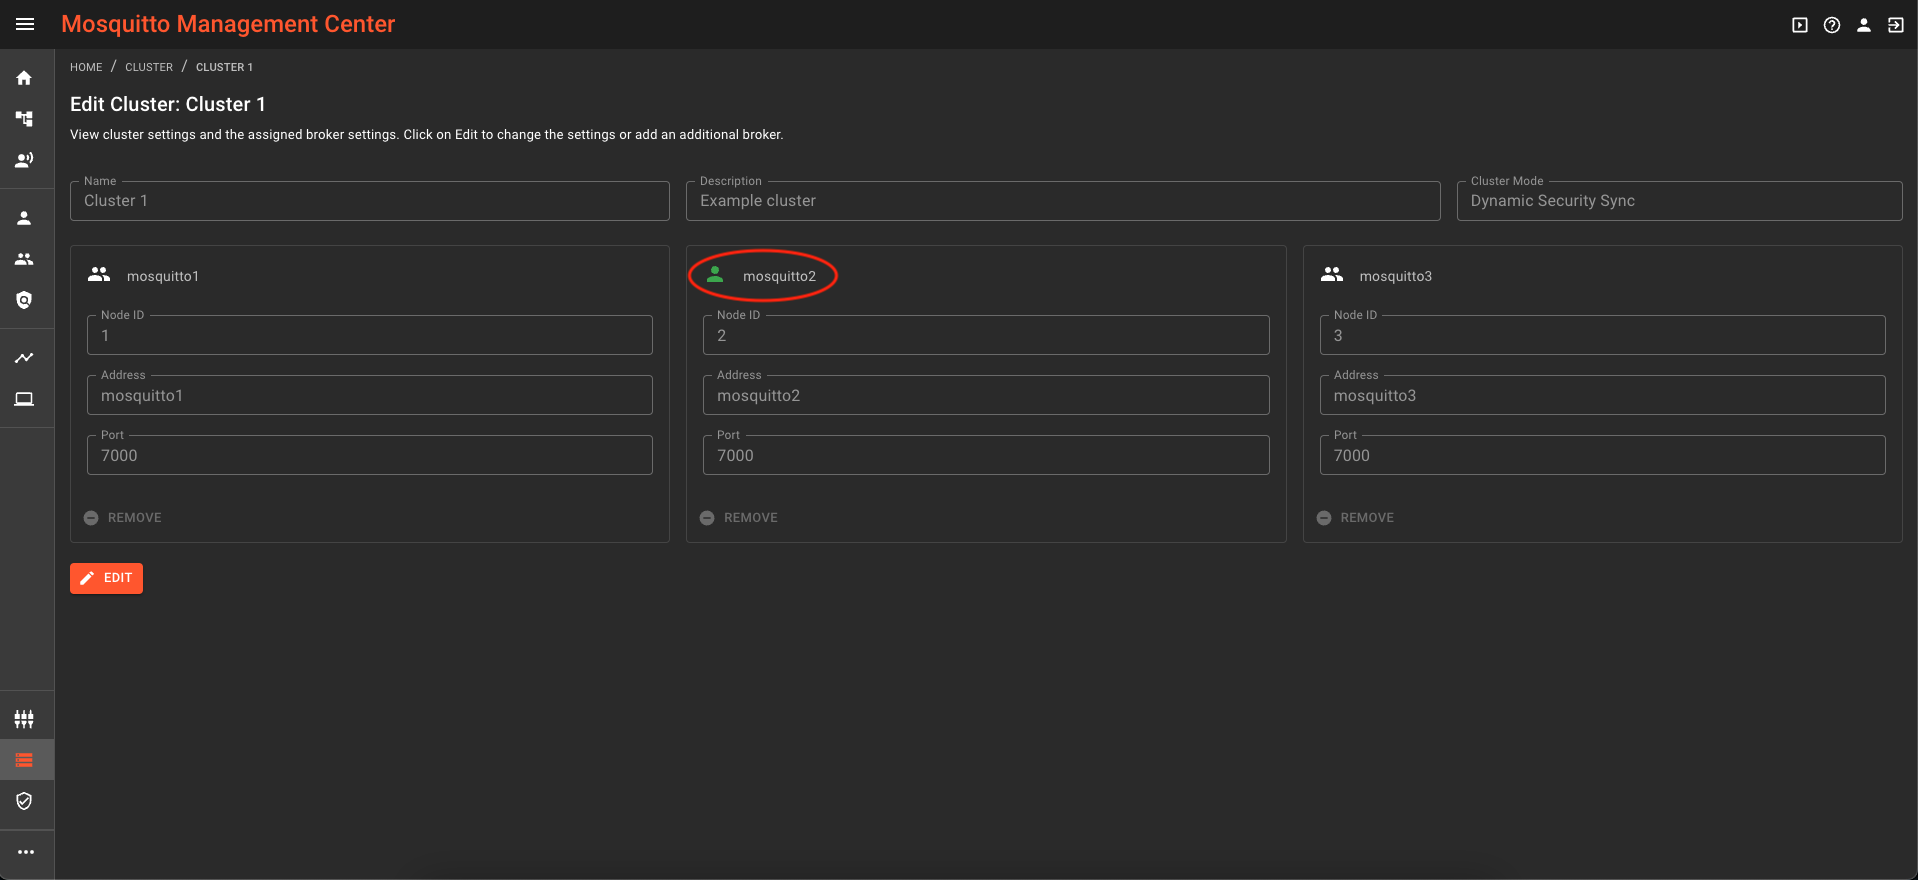
To add any DynamicSecurity (Clients/Roles/Groups) changes to the HA Cluster in the MMC, make sure to select the leader. To identify the leader, select the cluster by simply clicking on the entry in the “Cluster Management” menu. After that all associated nodes are displayed. The leader’s icon differs from the ones of the remaining nodes. (see image below).
For more information about the cluster configuration see here.
Configuration
The configuration of the entire setup is managed through multiple files. Here are the details of each file:
- docker-compose.yml: This file controls various settings related to the docker environment. It manages configurations such as port mappings and environment variables.
Additionally, there are other configuration files:
mosquitto.conf: This file is located in the
\mosquitto\configdirectory. It contains specific configurations for the Mosquitto component.config.json: This file is located in the
\management-center\configdirectory. It contains configurations specific to the Management Center component.
These files play a crucial role in customizing and fine-tuning the settings of the entire system.
Adjusting Docker Settings for Linux Environment
If you're using Linux for your Docker operations, there's one important setting you need to tweak. By default, Docker uses something called userland-proxy, but for smooth client communication, we need to turn this off.
Follow these steps:
- Locate the Configuration File
Open your file explorer and go to the /etc/docker/ directory. Inside, you'll find a file named daemon.json.
2.Edit the Configuration
Open daemon.json with a text editor (like Notepad or VSCode) to make changes. If the file doesn't exist, you can create it.
- Adjust the Settings
Replace the existing content with the following:
{
  "userland-proxy": false,
  "log-driver": "json-file",
  "log-opts": {
    "max-size": "100m",
    "max-file": "10",
    "labels": "production_status",
    "env": "os,customer"
  }
}
This configuration ensures that the userland-proxy is turned off and sets up some useful logging options.
- Save and Apply
Save the file and close the text editor.
- Restart Docker
To make these changes take effect, you'll need to restart Docker. You can do this by opening your terminal and running:
sudo systemctl restart docker