Clusters
High Availability provides the ability to run a Cluster of Mosquitto nodes with a single leader and multiple followers, so that broker availability can be ensured even if a single node becomes unavailable through fault or for an upgrade.
For further information about Clusters and High Availability please check the following detailed explanation of Mosquitto High Availability
Cluster Overview
The Cluster shows a table of all clusters known to the Management Center. For each cluster, you can see the name, a description and the number of nodes contained in the cluster. You can also delete the cluster definition by using the 'Delete' action on the right of the table. Below a table with one defined cluster:

Create Cluster
Before creating a cluster, it is necessary to connect your future cluster nodes to the Management Center. Make sure to be connected via Port 1885, to allow direct communication to the individual nodes, using a client with ACLs to read and write on the $CONTROL topic of the broker.
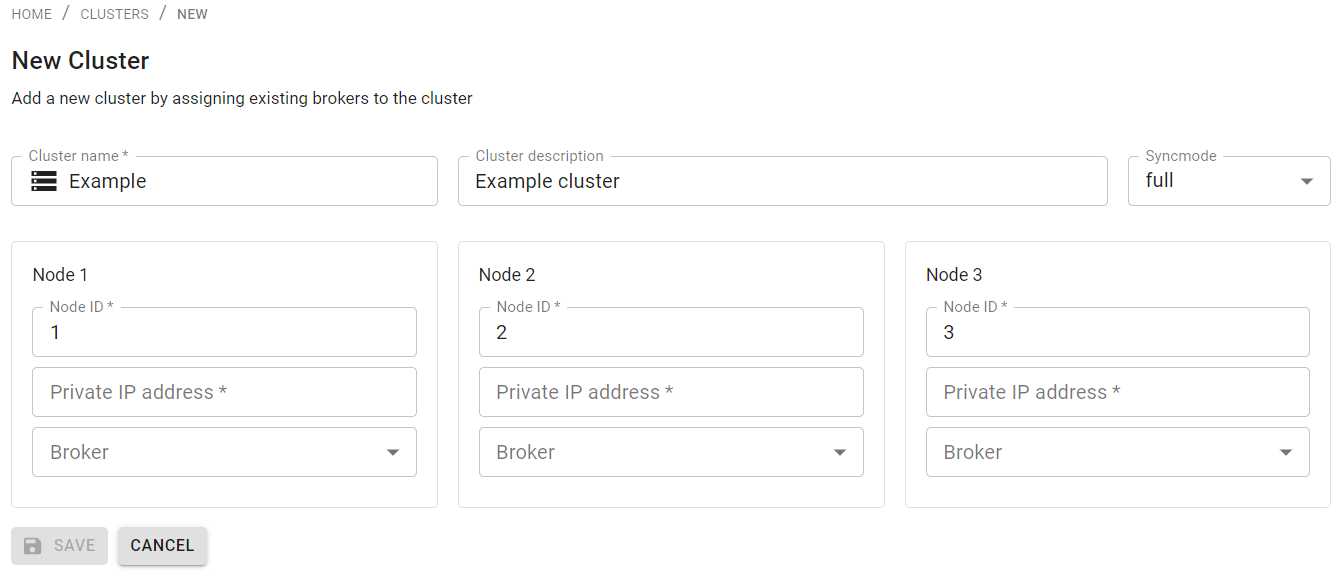
To create a new high availability cluster, click on the button "New Cluster". On the following page you can enter the detail information about the cluster that you want to create.
First enter a unique Cluster name and optionally a description. There are two Syncmodes available to choose from:
- full: TODO
- dynsec: The clusters are independent, but share dynamic security configurations.
You need to define at least two cluster nodes (broker instances). For each select a unique Node ID, enter the IP address of the broker with in its private network and select the preconfigured connection.

When you have entered all the necessary information, click on "Save". The new cluster will now be set up and the configuration will appear in the cluster table.
Edit Cluster details
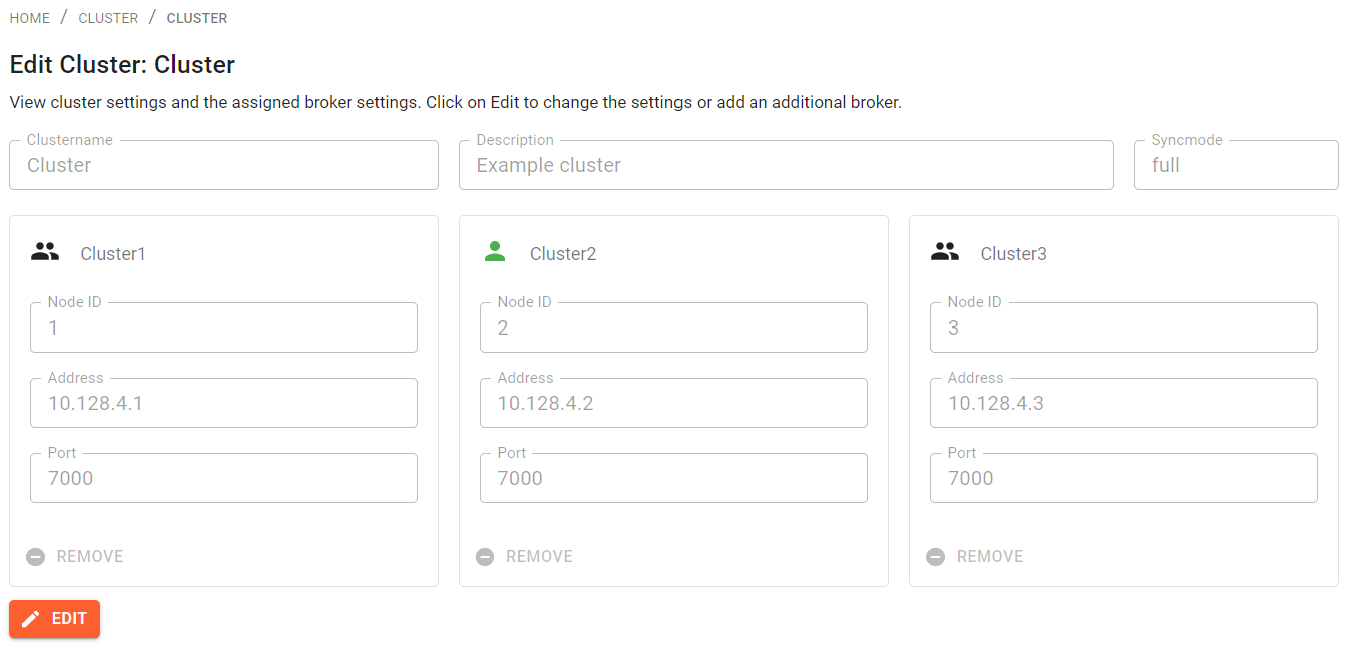
Select the cluster in the table and click. This will navigate you to the detail view of the cluster. The leader and follower are indicated by different icons. The leader has a green icon.
To modify settings or add a new node, first switch into edit mode by clicking on the button "Edit". Then, click on "Add node", which will open a select dialog that lists all available Mosquitto connections.

See here a cluster with three nodes, with the leader being the one with "Node ID" 2.
Remove nodes from a cluster
Navigate to the cluster detail page (e.g., by selecting it in the overview list) and click the "Edit" button. Then, in order to remove a node, click on the "Remove" button next to that node.
Delete a Cluster
Delete the Cluster by clicking the "Trash Bin" icon in the cluster table.
Enable Cluster Management
To enable the Cluster Management feature, make sure you are using the Premium Edition of Mosquitto and that you have the
feature enabled in your license. Also, ensure that your config file (specified with CEDALO_MC_PROXY_CONFIG
environmental variable or by default saved in management-center/config/config.json) contains the following entry
inside the plugins array:
    {
      "name": "cluster-management"
    }
On start-up, the Management Center will print a message that the cluster-management plugin is enabled and loaded into
the console:
Loaded plugin: "cedalo_cluster_management" (Cedalo Cluster Management).