Publish & Subscribe
Publish & Subscribe is the in-browser MQTT test client for this broker. Open it from the broker sidebar under TOOLS. Use it to connect a client, subscribe to topics, publish payloads, and inspect received messages.
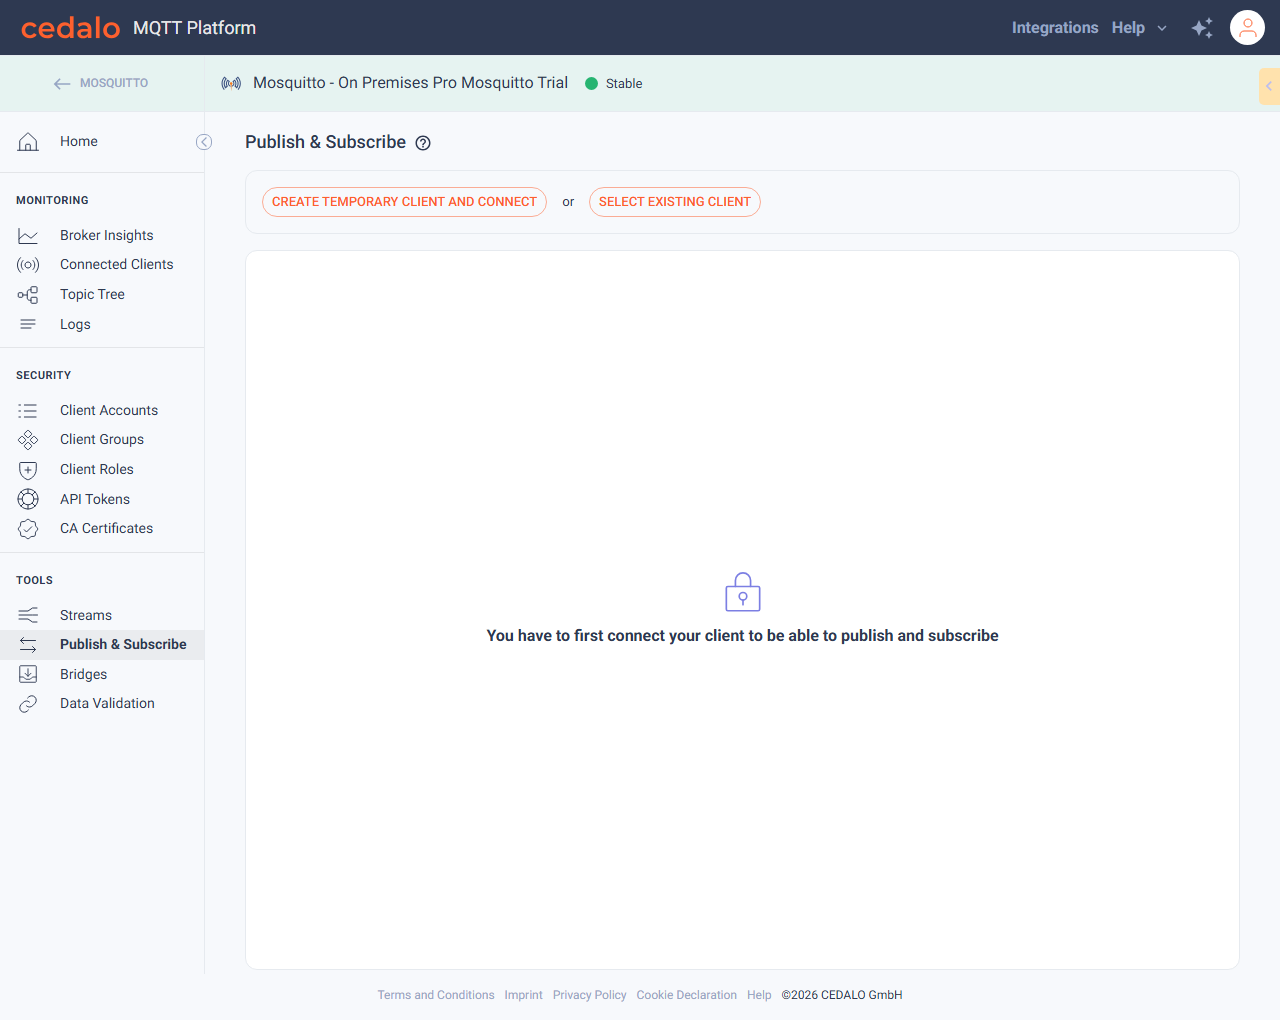
Open Publish & Subscribe
- Open a project, then open a broker.
- In the broker sidebar under TOOLS, click Publish & Subscribe.
The page title is Publish & Subscribe. Until a client is connected, the page shows connection choices and the note You have to first connect your client to be able to publish and subscribe.
Connect a temporary client
The fastest way to try the page is to create a temporary Dynamic Security client and connect it:
- Click Create temporary client and connect.
- Wait until the button changes to Disconnect and the client fields show a username such as
pf_pubsub_….
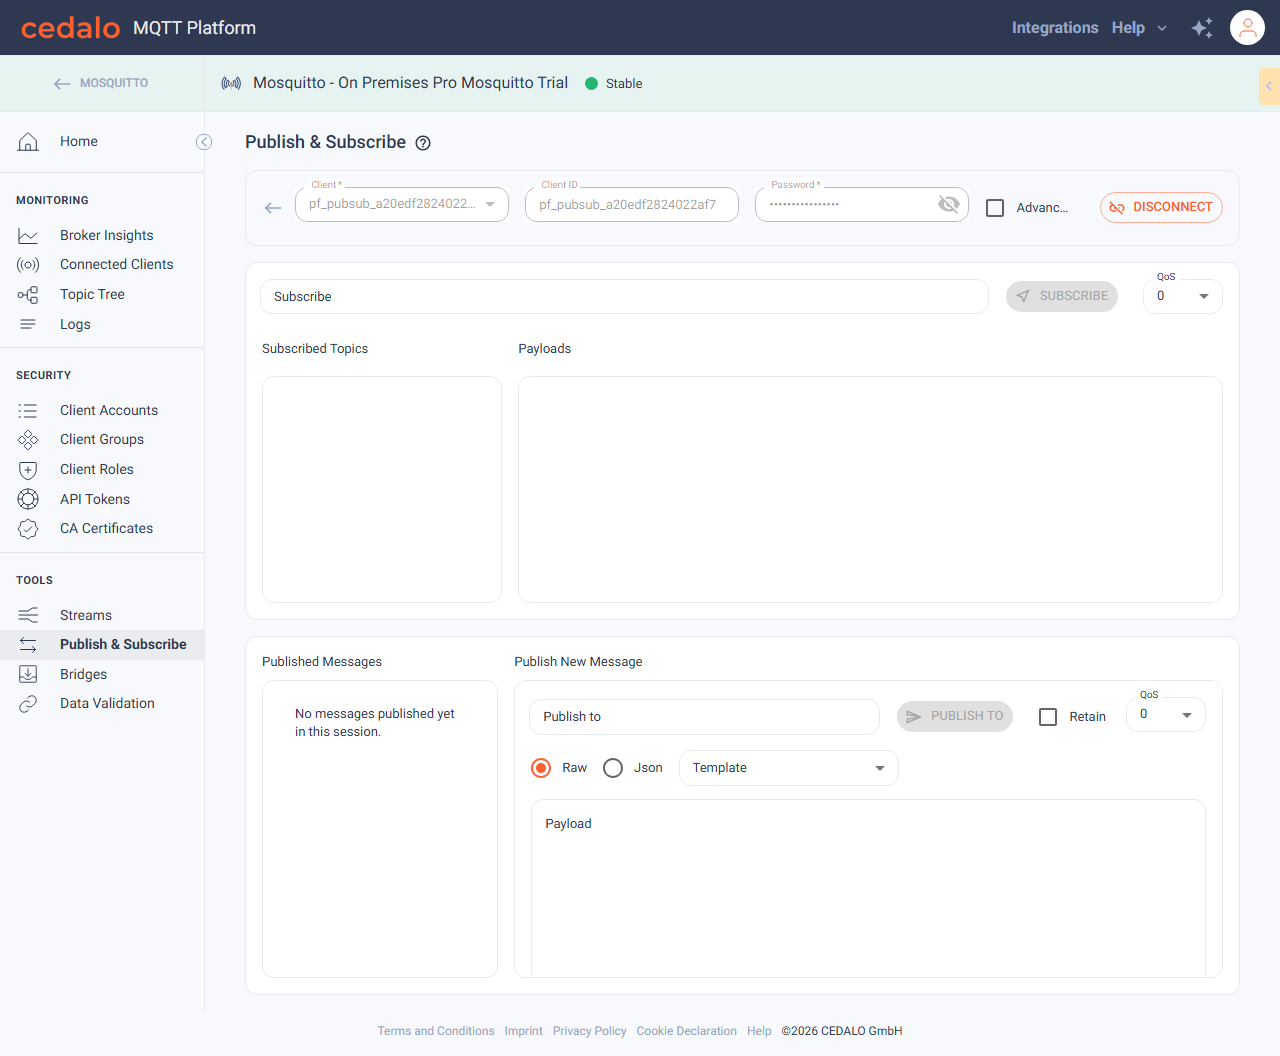
Temporary clients are created for this session. Prefer them for quick tests so you do not need an existing password. For production-style tests, use a real client account with the right ACLs (see below).
Connect with a selected client
To connect as an existing Dynamic Security client:
- Click Select existing client.
- Choose a client from Client (or type a username if no clients are listed).
- Optionally set Client ID.
- Enter the client Password.
- Click Connect.
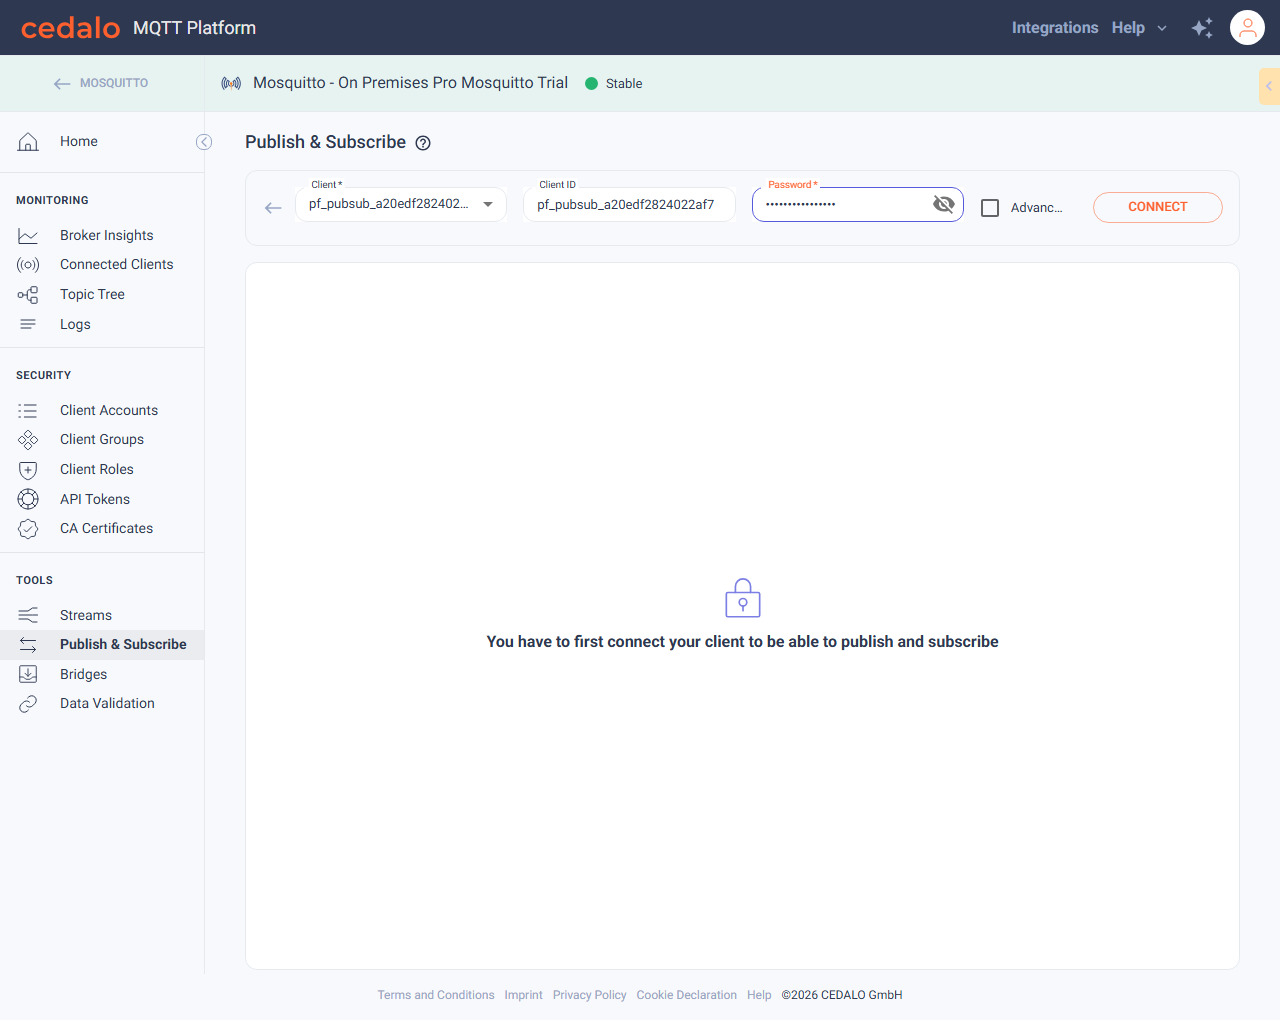
When the session is up, the button changes to Disconnect and the selected username stays in Client.
The client must have a password set and roles/ACLs that allow the topics you subscribe to and publish on. Not authorized errors usually mean the role or ACLs need adjustment under Client Accounts or Client Roles. Optional Advanced settings (TLS certificate, protocol, port, CA) are available on this form when you need them. On a narrow connection row the Advanced label is shortened with an ellipsis.
Subscribe to a topic
With a connected client:
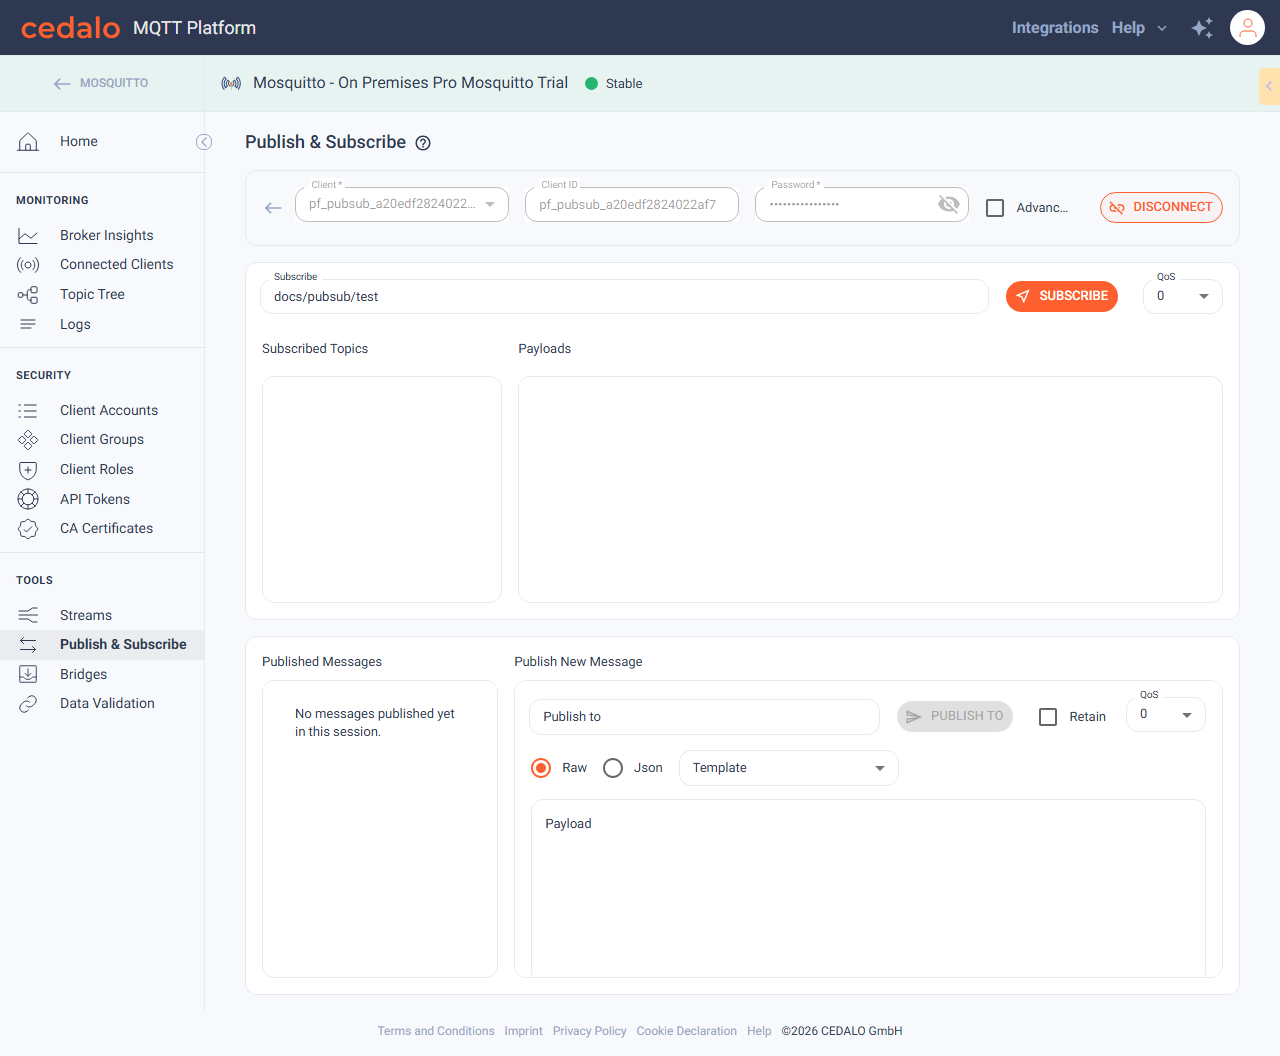
- Enter a topic in Subscribe (for example
docs/pubsub/test). - Optionally set QoS (0, 1, or 2).
- Click Subscribe.
The topic appears under Subscribed Topics. A long topic name is shortened with an ellipsis; hover it to read the full name. Incoming messages for that subscription appear under Payloads.
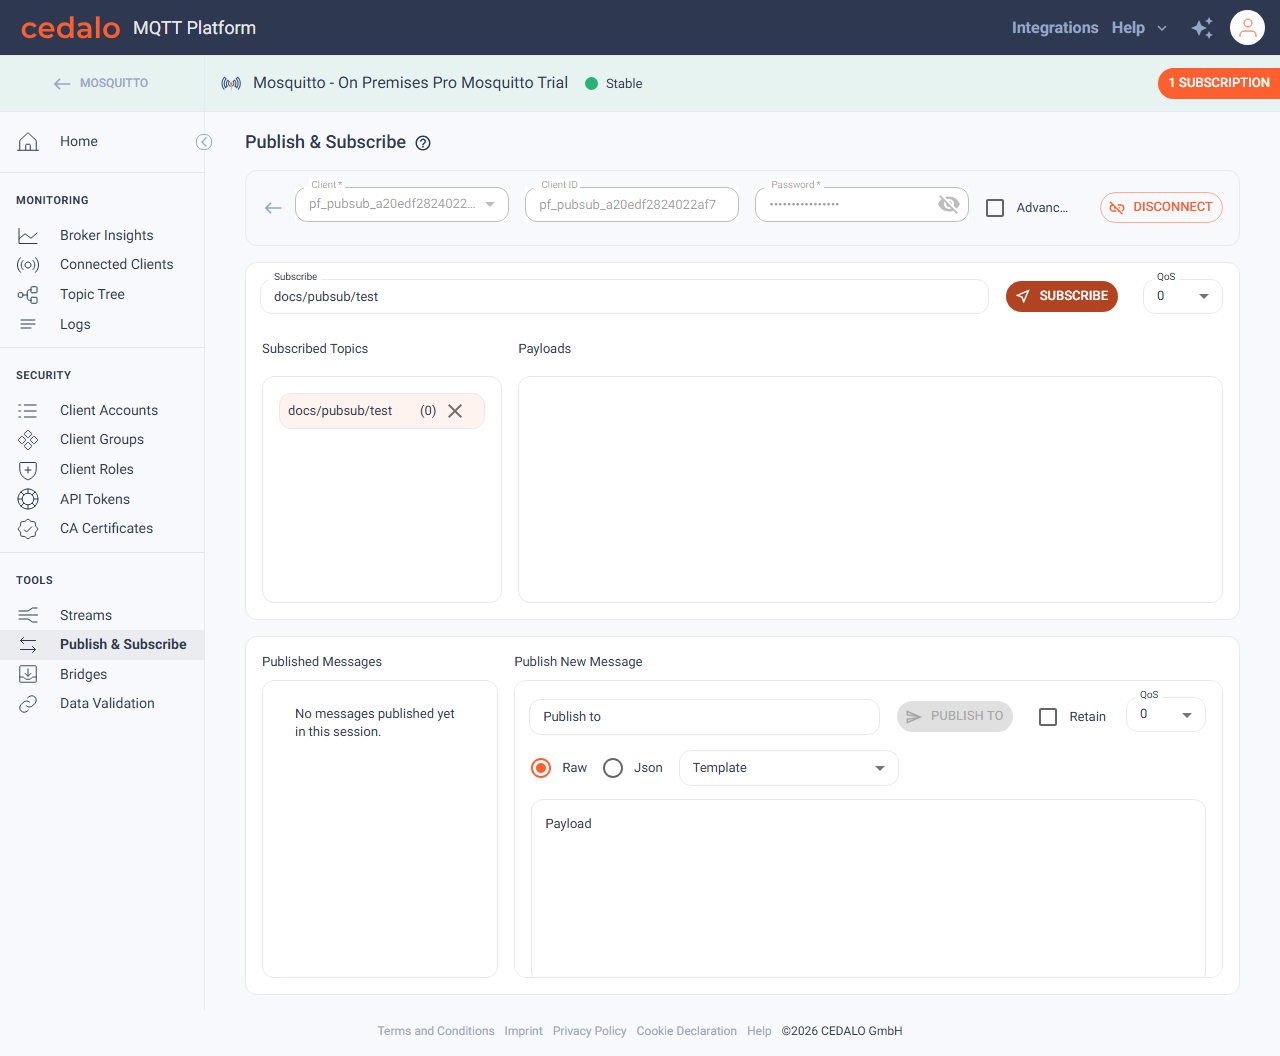
You can also use Subscribe to all topics (#) when that option is available and not blocked by platform settings.
Publish a message
- Under Publish New Message, enter the topic in Publish to (for example
docs/pubsub/test). - Enter a Payload (raw text or JSON).
- Optionally enable Retain and set QoS.
- Click Publish to. The button shows a send icon. When the publish page is narrower than 900px, only that icon is shown.
On success, the platform shows Message to Topic: "…" was published! The message appears under Published Messages. If you are subscribed to the same topic, it also appears under Payloads.
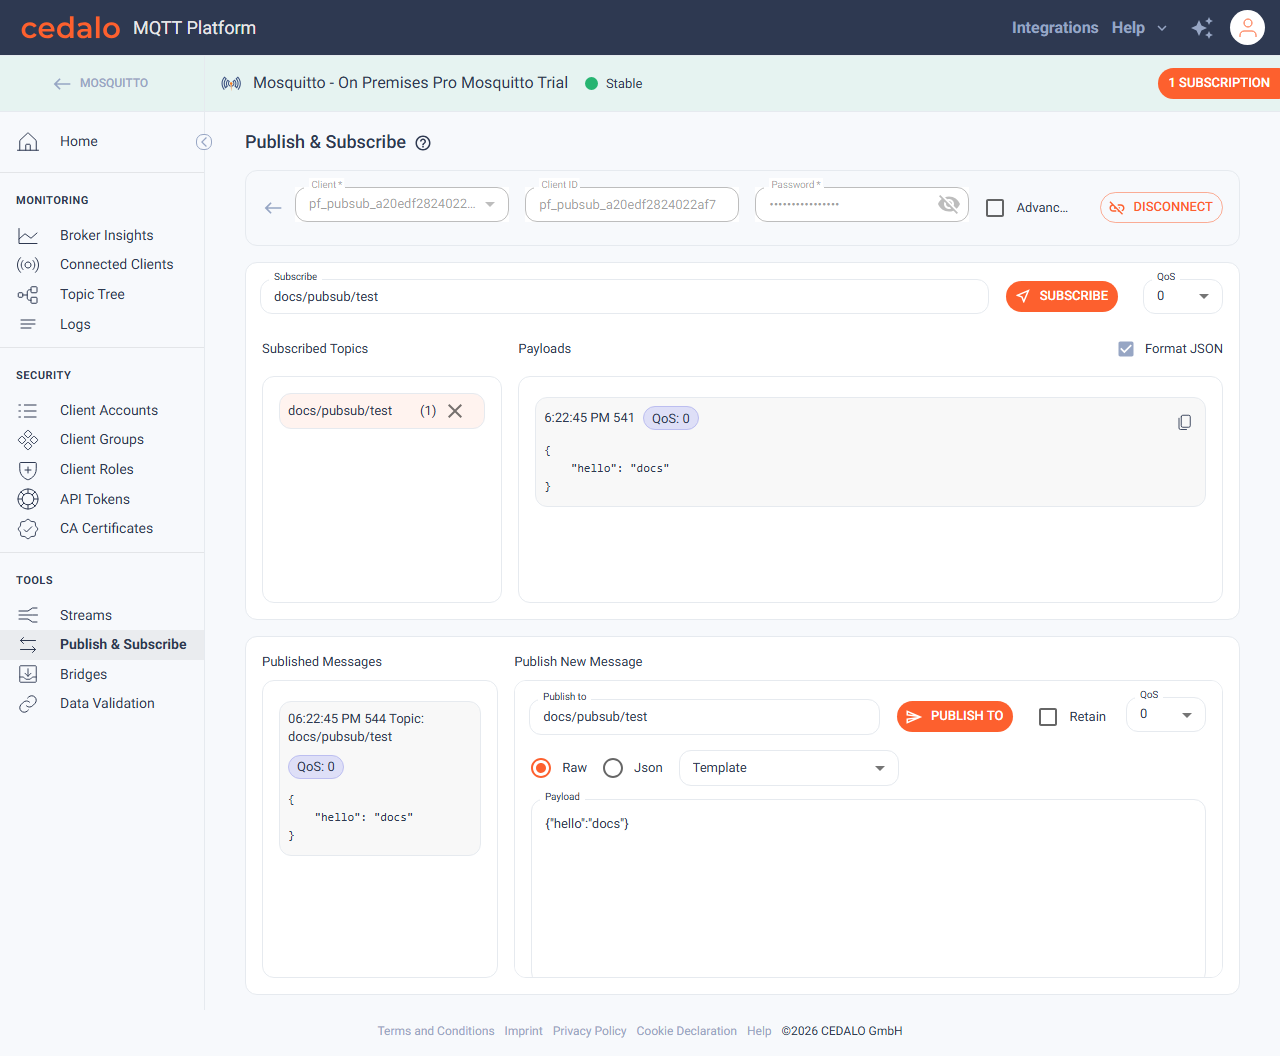
Wildcards (#, +) are not allowed in publish topics.
Inspect subscribed payloads
Format JSON and Show History sit on the right of the Payloads heading. They apply to the topic selected under Subscribed Topics. The same controls are in the subscription monitor overlay.
Format JSON
Format JSON appears after at least one payload on the selected subscription is JSON. It is on by default.
- Checked: JSON is indented so it is easier to read.
- Cleared: the payload is shown exactly as it was received.
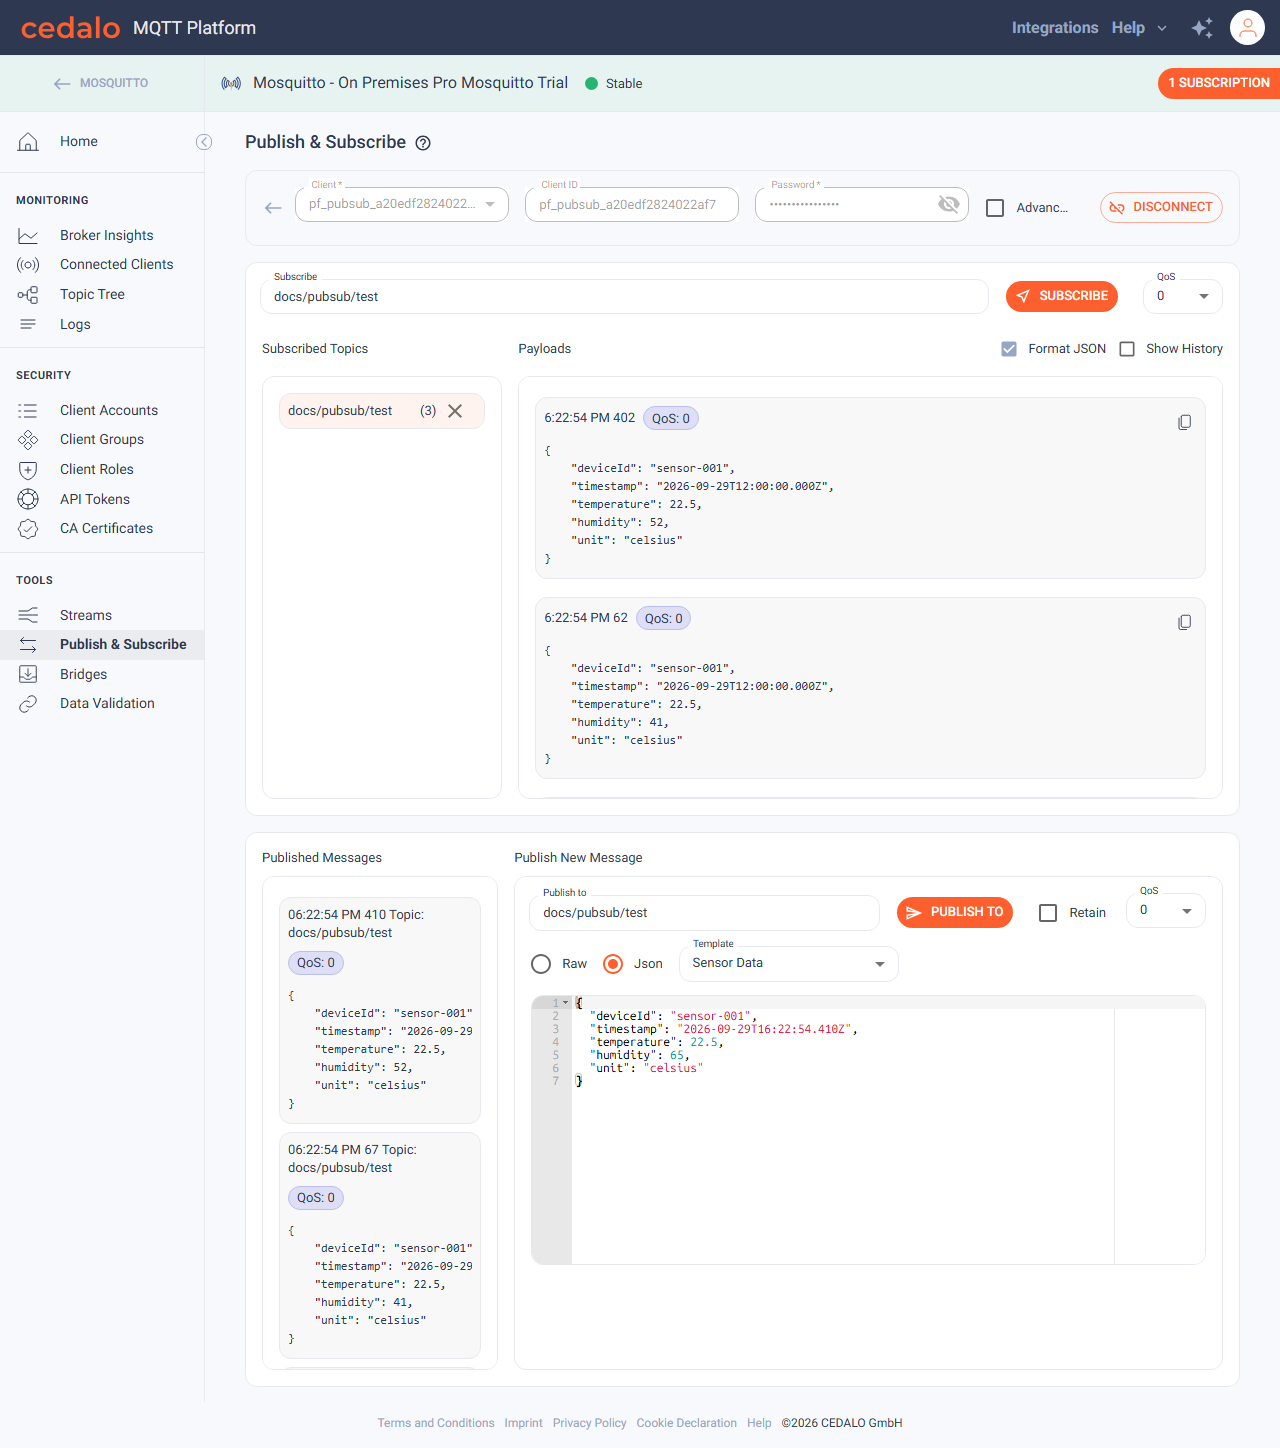
Show History
Show History appears when a payload is a number, or when JSON contains numeric fields. It is off by default.
To build a short history, use the Sensor Data template:
- Under Publish New Message, open Template and choose Sensor Data. The payload switches to JSON.
humiditystarts at65. - Set Publish to to the subscribed topic.
- Change
humidity, then click Publish to. - Publish once more with a different
humidity. After each publish the template fills the payload again, so set the new value before the second publish.
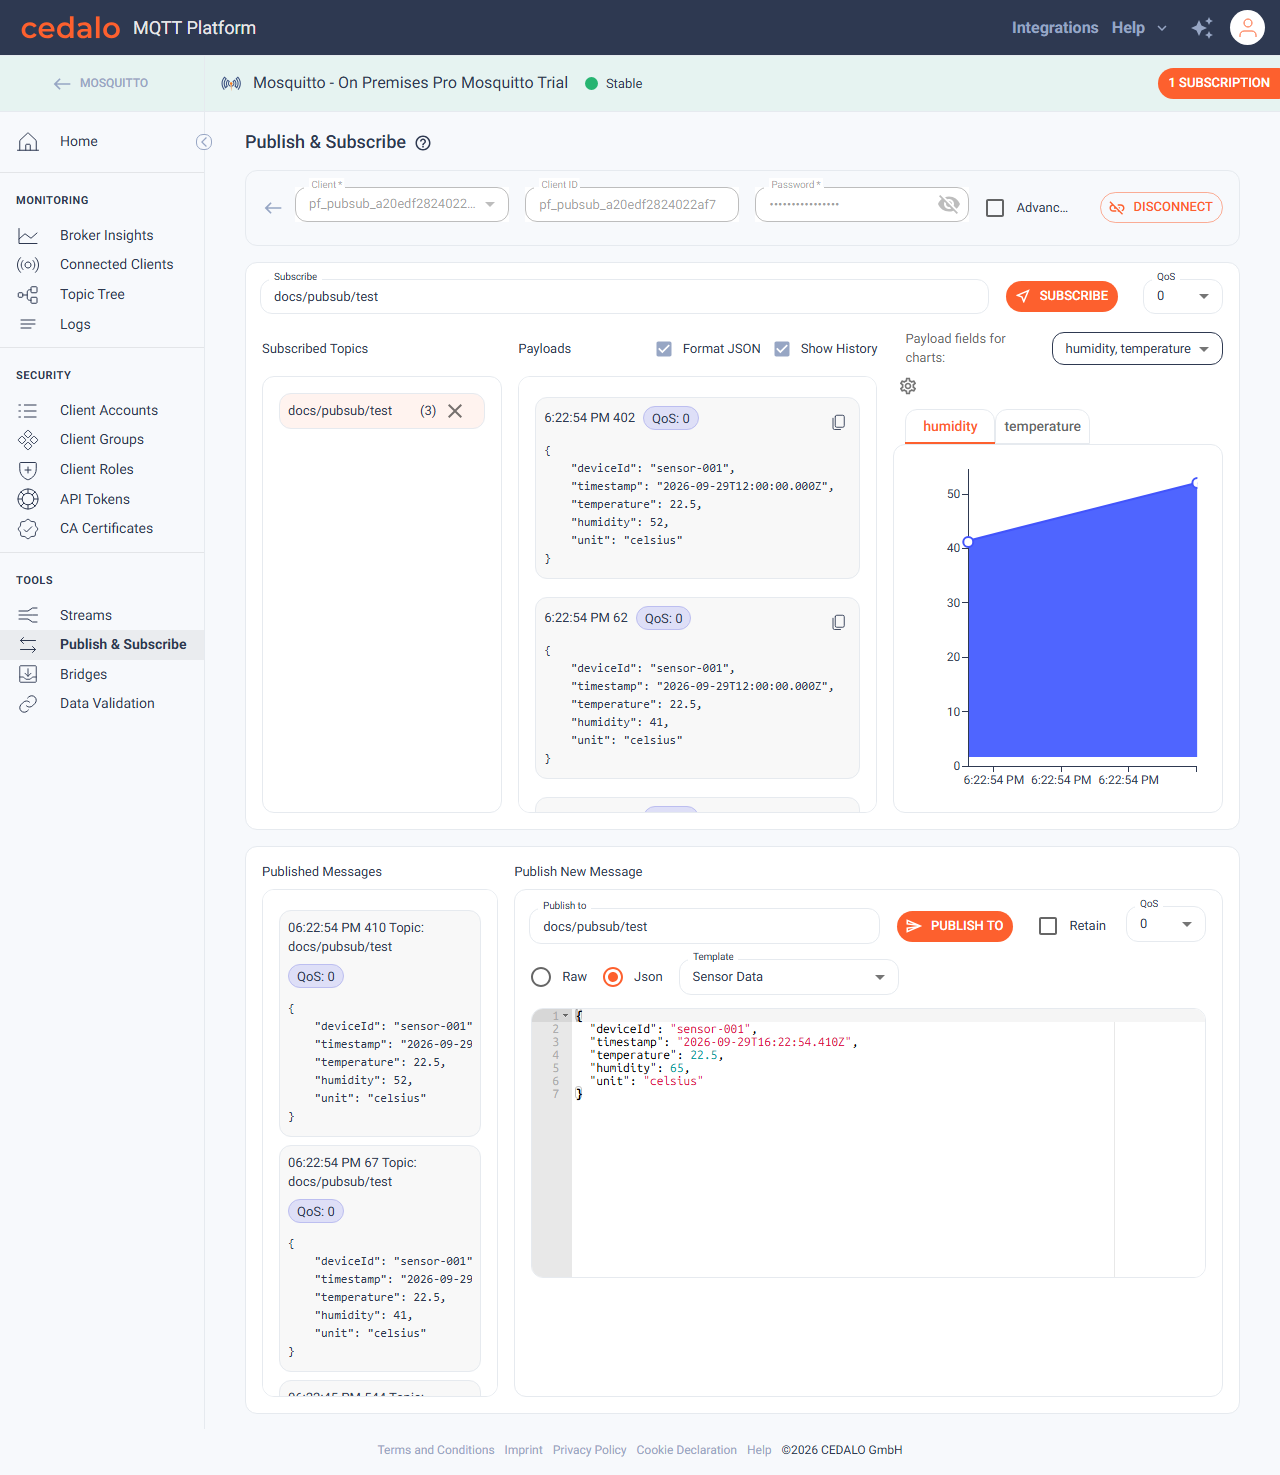
Check Show History. A payload history chart opens beside the payload list. Payload fields for charts includes humidity. Chart settings adjusts the line, area fill, point labels, and horizontal grid. Clear Show History to hide the chart.
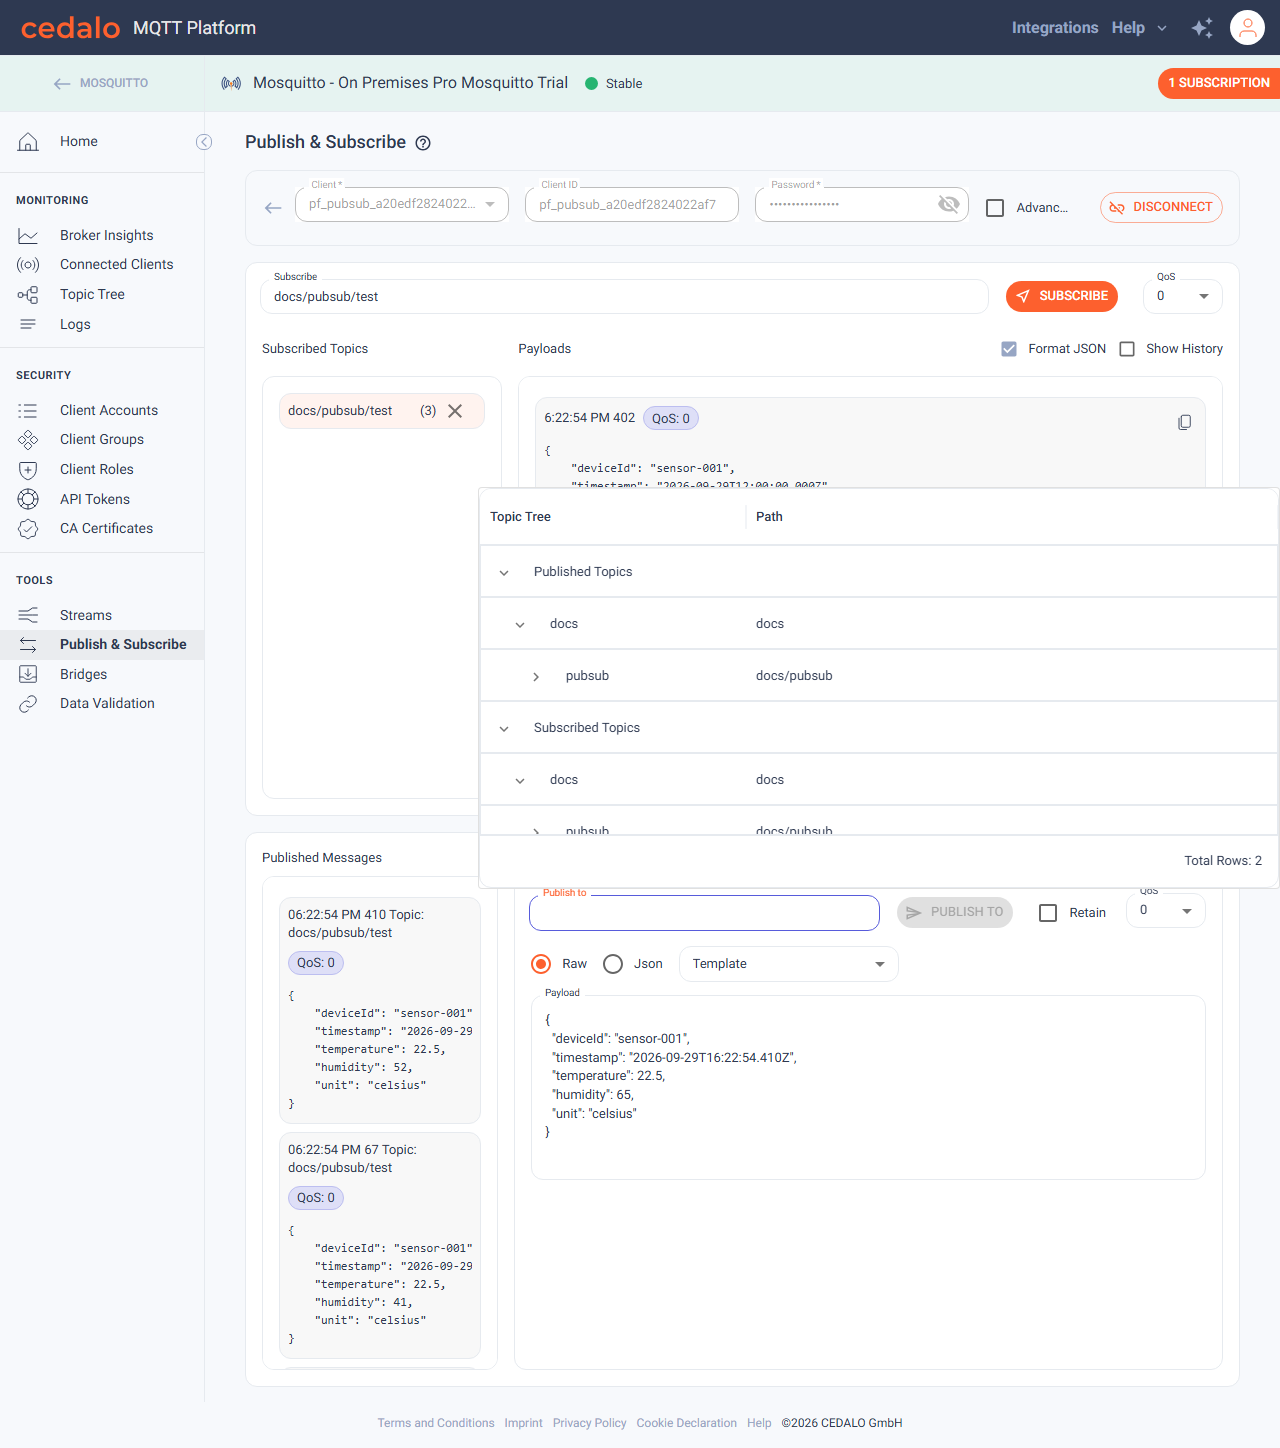
Select a topic from the Topic Tree
Instead of typing a publish topic, you can pick one from the broker’s live Topic Tree:
- Click the Publish to field so it is focused.
- A Topic Tree popover opens under (or above) the field, with Published Topics and Subscribed Topics.
- Expand path segments as needed, then click a topic row.
The selected topic fills Publish to, and the popover closes. Enter a payload and click Publish to as usual.
Subscription monitor overlay
While at least one topic is subscribed, the broker header shows a button such as 1 Subscription (or N Subscriptions).
- Click 1 Subscription (or N Subscriptions).
- The button label changes to Hide. A panel opens on the right, directly under the app bar, with the active client name, Disconnect, Subscribed Topics, and Payloads.
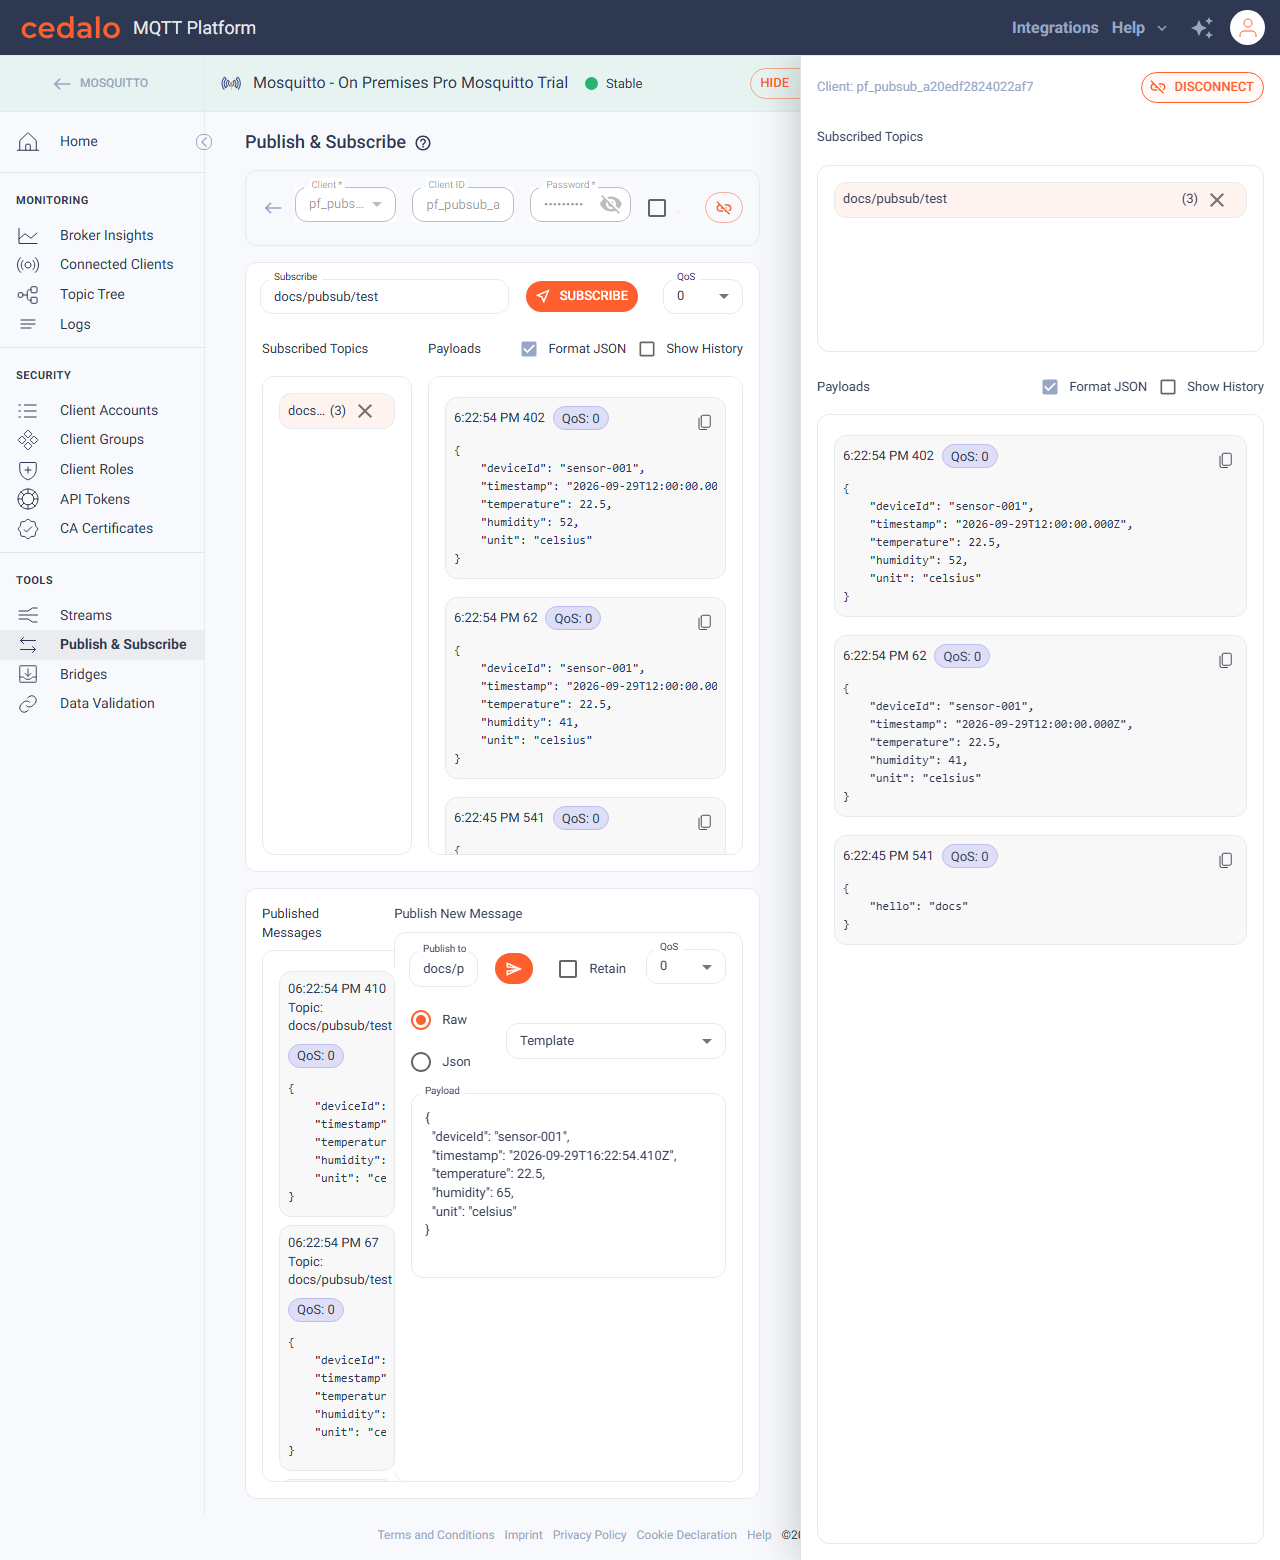
The panel stays available as you move to other broker pages (for example Home), so you can keep watching payloads without staying on Publish & Subscribe. Click Hide to close it. When the last subscription is removed, the button disappears and the panel closes.
Disconnect
Click Disconnect to close the MQTT session. The button includes a link-off icon. When the publish page is narrower than 900px, only that icon is shown. Publish and subscribe controls return to the disconnected state. You can connect again with Create temporary client and connect or Select existing client.
If the page cannot reach a public broker connection, follow Go to settings on the error and fix the connection on broker Home. Not authorized errors usually mean the client role or ACLs need adjustment under Client Accounts / Roles.