Roles
This section describes how to manage roles and ACLs (Access Control Lists). A role contains a number of ACLs, which either specifically allow or deny an action. Add as many ACLs as you need to a role.
Roles are part of the dynamic security of Mosquitto. See here for a detailed description of the concepts of dynamic security.
The dynamic security feature is available since version 2.0 of Eclipse Mosquitto. If you are still using version 1.6, see this guide on how to migrate.
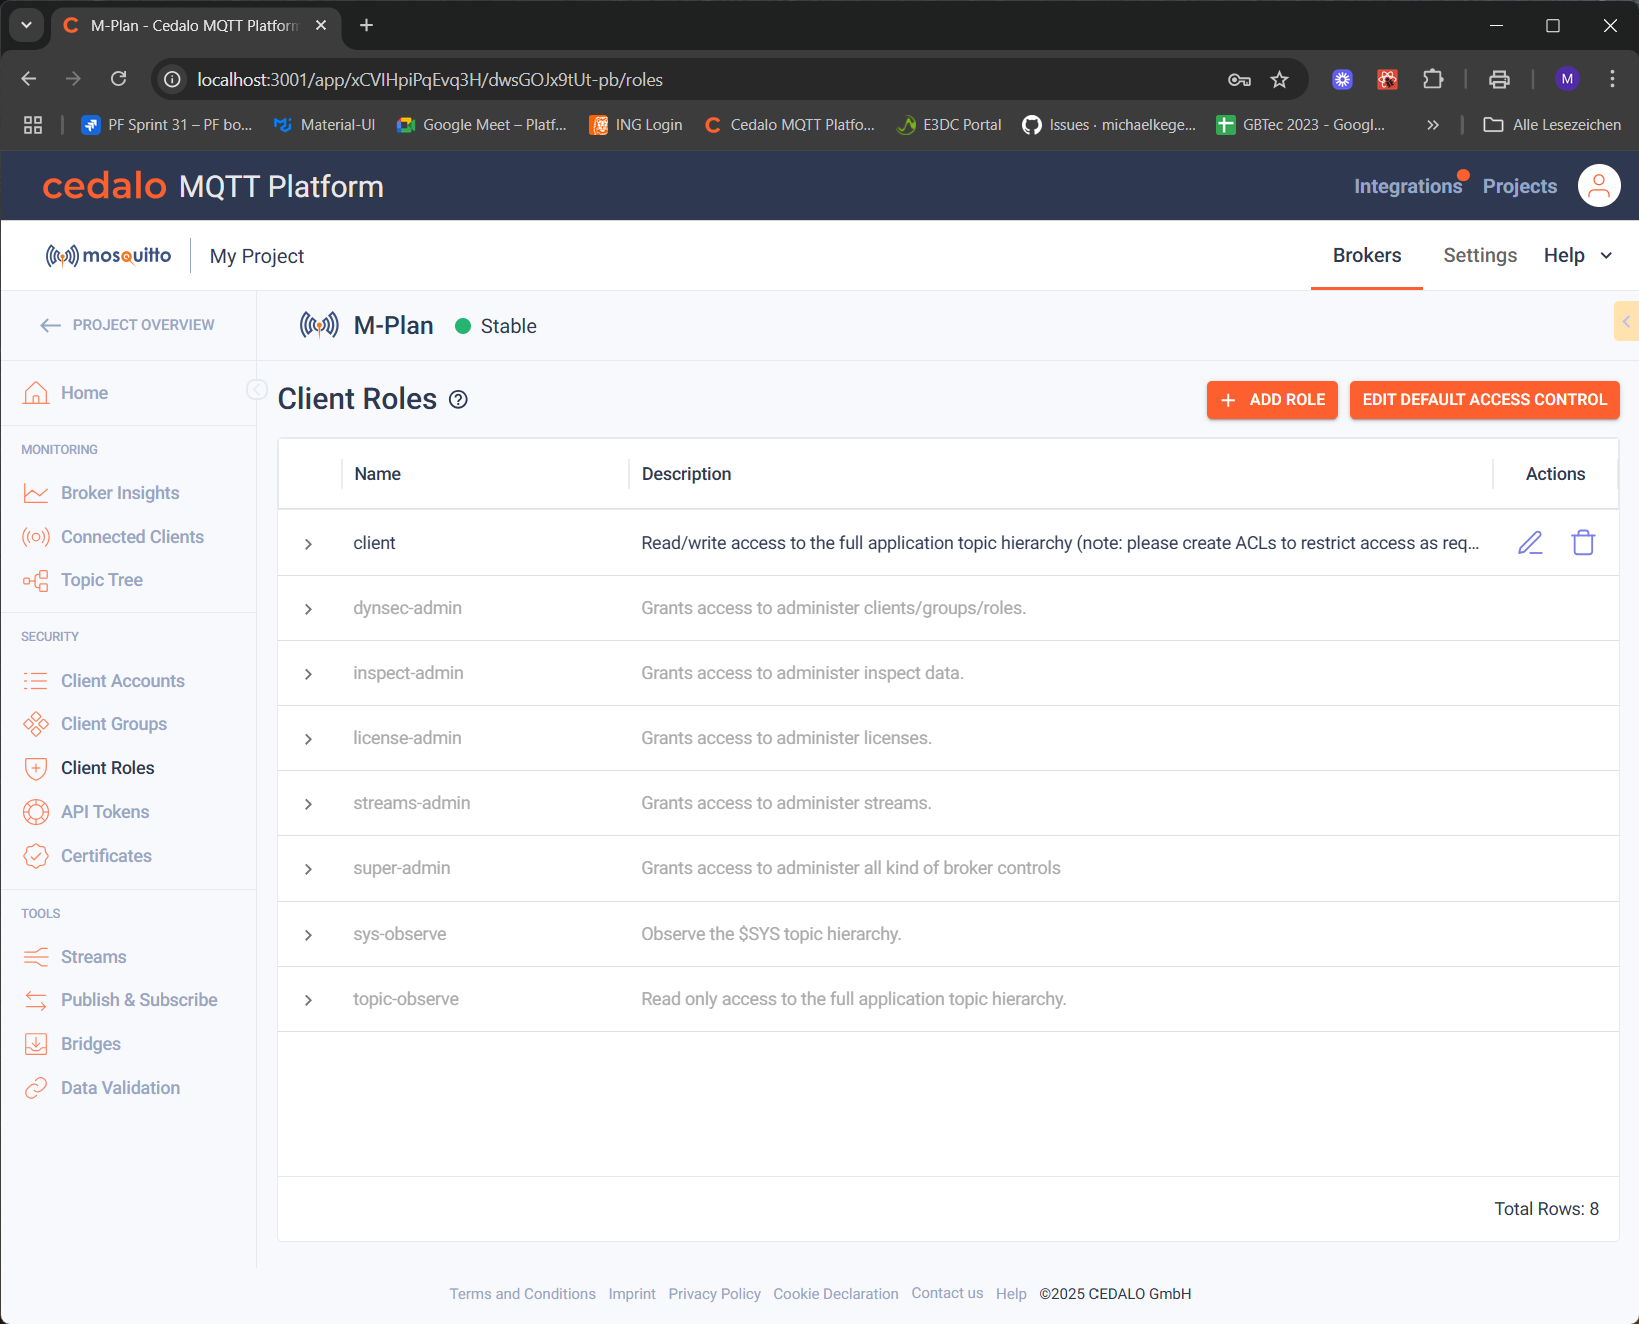
First navigate to "Client Roles" within the MQTT Platform navigation. Then the role overview page is opened.
Roles Overview
The roles overview lists all roles showing their name and description. Here you can also add, edit or delete roles. For each role you can edit the Access Control Lists.
Following a table with the default roles:

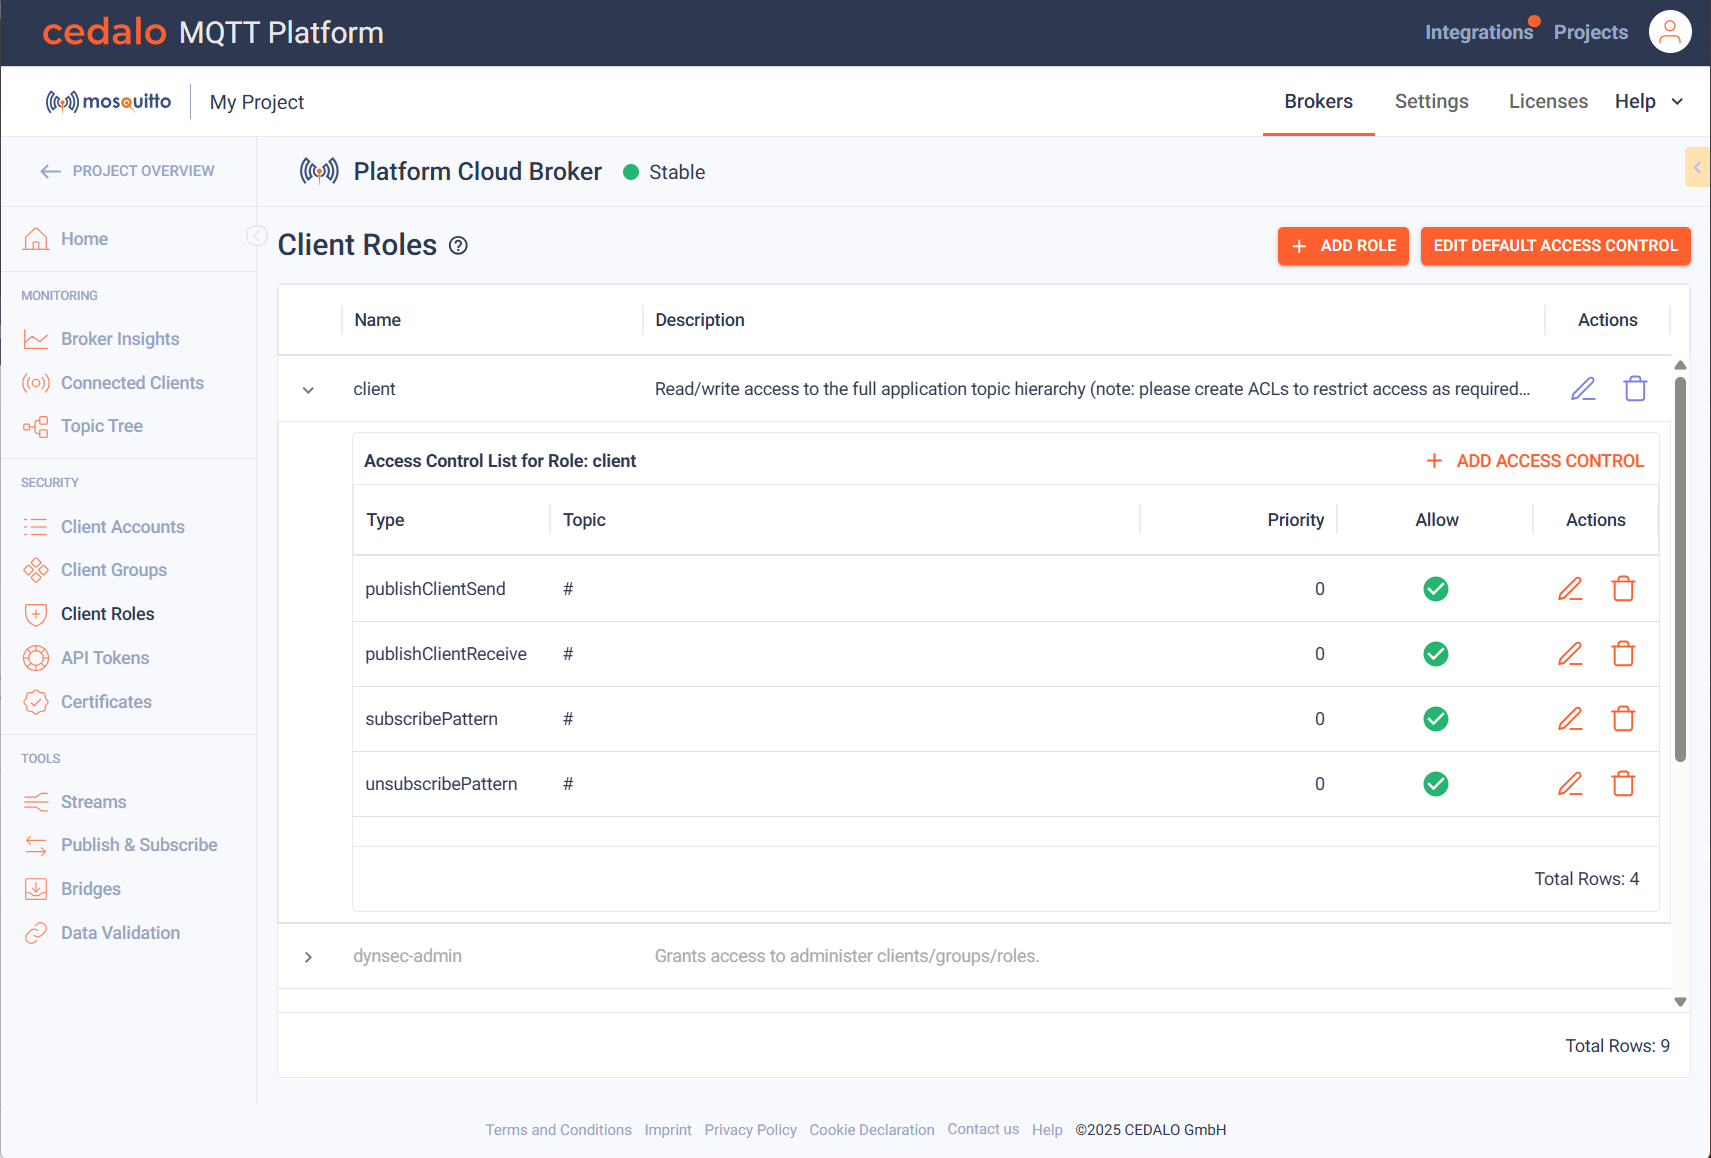
The Access Control List for a role can be viewed by clicking in one the arrow symbol left to the role name. After the arrow button has been clicked, you can view the table of defined access restrictions.

Create roles
Create a role by clicking the "Add Role" Button at the top right. The new role is displayed in the top row of the table. Now you can add the following properties:
- Name: Enter a unique name for the role
- Description: Enter an optional description for the role to describe the purpose of the role
When you are done, save the role by clicking on the save button. If you do not want to save the role, click on cancel and the role will not be created.
After saving the new role, the ACL for the role is automatically opened. Now you can add access restrictions or permissions. This will be described in detail below.
Modifying or deleting a role.
In the actions columns, you have the following options, when you are not in edit mode:
Click on the "Edit" button in to change the properties, which are explained above. If you are in edit mode, you have the following options:
Role ACLs
Role Acls can be viewed and hidden by clicking on the arrow button left to the name of the role. A table with the existing entries is shown. Click on "Add Access Control" to create a new permission or restriction. The following settings can be defined for an entry:
Type: Select from one of the following ACL types:
Type Usage publishClientSend Restrict the topics this client is allowed to use when publishing to the broker publishClientReceive Restrict the topics this client is allowed to use when receiving published messages from the broker subscribeLiteral Restrict the exact topic filters that this client is allowed to subscribe to. Setting to #would mean the client cannot subscribe to the#topic, but could subscribe totest/topic, for example.subscribePattern Restrict a range of topic filters that this client is allowed to subscribe to. unsubscribeLiteral Restrict the exact topic filters that this client is allowed to unsubscribe from. Setting to #would mean the client cannot unsubscribe from the#topic, but could unsubscribe fromtest/topic, for example.unsubscribePattern Restrict a range of topic filters that this client is allowed to unsubscribe from.
- Topic: Enter the topic, that you want the settings to be applied to.
- Priority: Enter the priority. The meaning is described here : priority.
- Allow: Decide whether to allow or deny the setting.
Configuring default access control
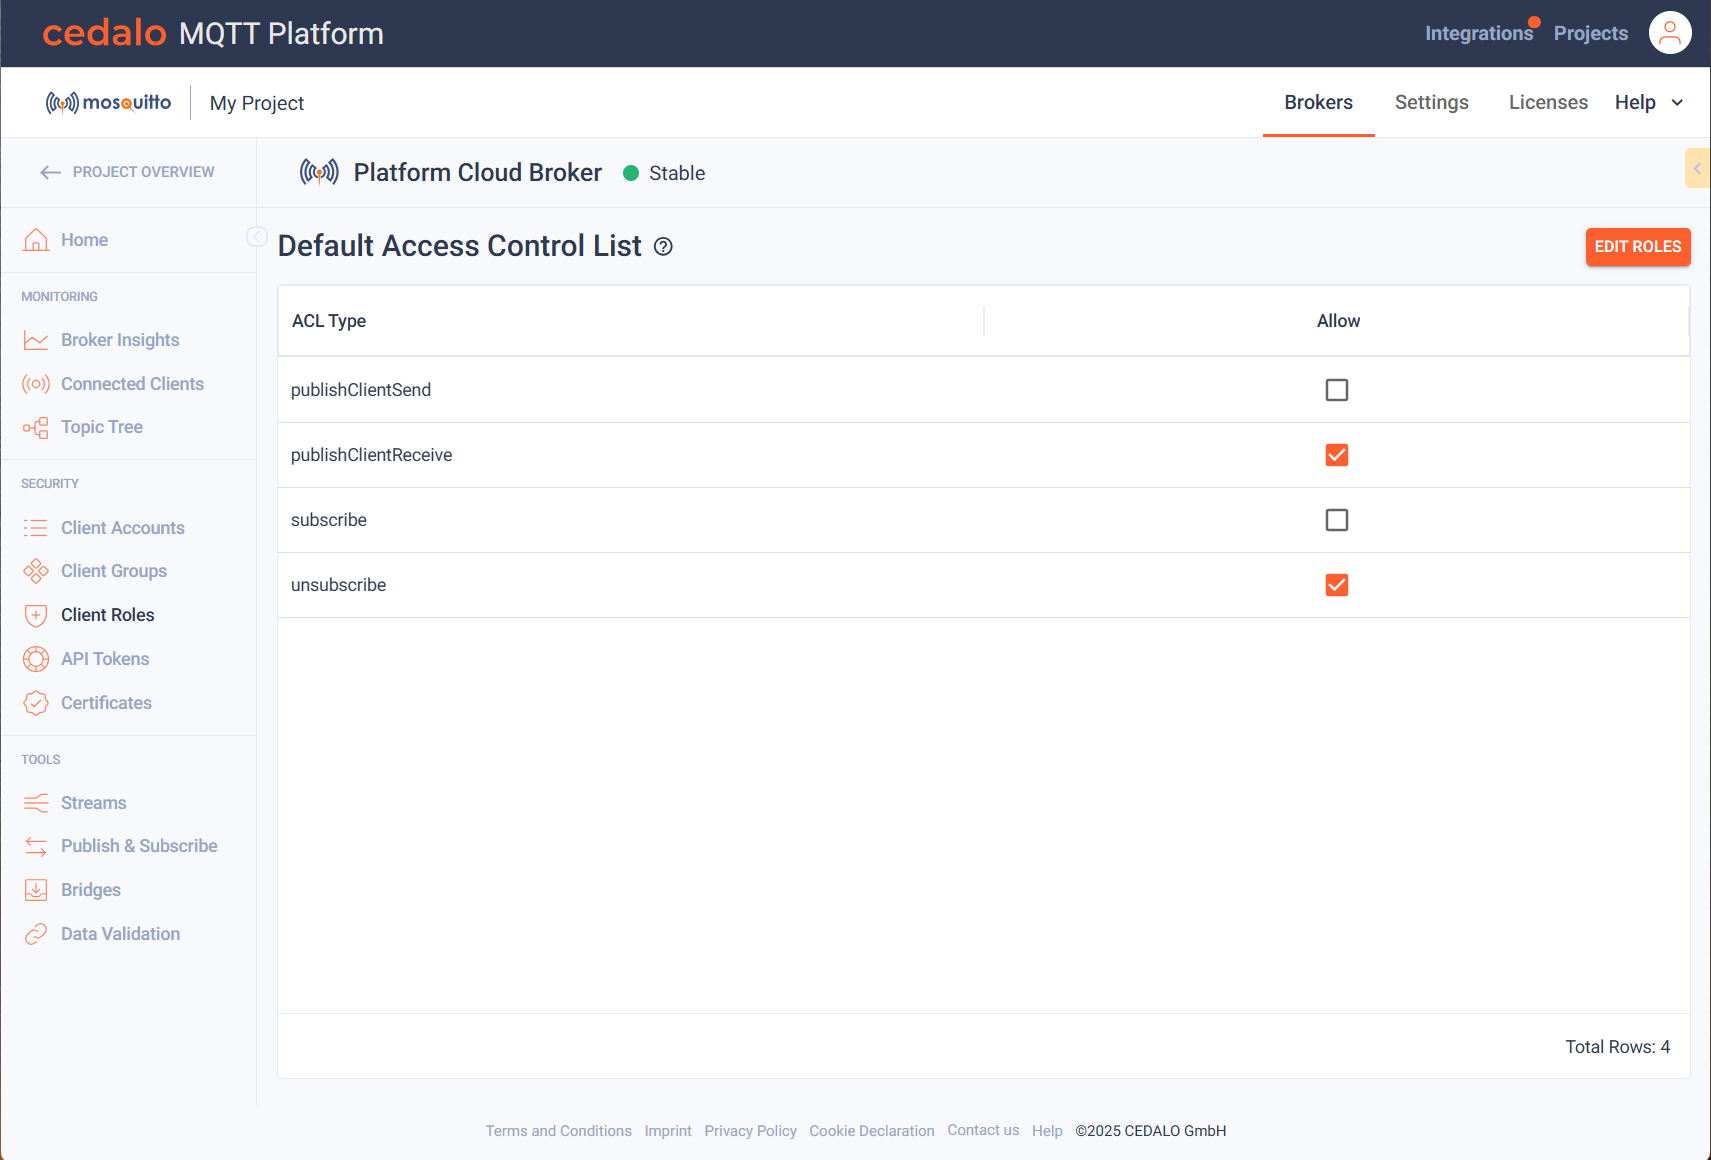
The Default ACL Access setting allows you to specify the default permission that will be applied if no explicit rule ( either allow or deny) has been defined for a particular action. It is essentially a fallback mechanism that decides what to do when there are no role-based permissions matching the request. To edit the default access control click on the button above the role overview table.
The initial configuration sets the default ACL type behaviors to:
publishClientSend: denypublishClientReceive: allowsubscribe: denyunsubscribe: allow
Then the following table is displayed, where you can define the default settings:
